Basement waterproofing is one of the most important steps in protecting your home’s foundation, preventing mold growth, and maintaining a healthy living environment. Whether you’re dealing with occasional seepage or a chronically wet basement, understanding the best basement waterproofing methods can help you choose the right solution for long-term protection.
This guide breaks down the three primary basement waterproofing methods—plus essential exterior improvements—so you can confidently plan your waterproofing project.
Why Basement Waterproofing Matters
A wet basement is more than an inconvenience. Persistent moisture can lead to:
Foundation deterioration
Mold and mildew
Damage to finished living spaces
Reduced home value
The good news? Effective basement waterproofing almost always starts with simple, strategic steps outside your home.
Exterior Basement Waterproofing Methods
Before installing an interior system, always evaluate and improve exterior drainage. Proper exterior grading and water management help prevent water from pooling around the foundation—one of the leading causes of basement leaks.
Keeping water away from the foundation reduces hydrostatic pressure and limits the chance of basement seepage.
2. Proper Grading Around the Foundation
Water should naturally flow away from your home.
Check for:
Low spots around the foundation
Settled soil or erosion
Patio blocks, slabs, or walkways that have shifted or begun tilting back toward the home
Re-grading these areas can significantly improve surface drainage and reduce the load on any interior basement waterproofing system.
Interior Basement Waterproofing Methods
When exterior options are limited—or when water issues are more severe—interior systems offer reliable, long-term basement waterproofing. Below are the three primary basement waterproofing methods used inside homes, including when each is appropriate.
You experience occasional seepage—such as during heavy rains or rapid snowmelt
Limitations:
Not recommended for basements with high water tables
Not suitable when water rises significantly inside block walls
Less effective for chronic or severe basement water problems
This system can be a good starter solution but is not considered one of the best basement waterproofing methods for major issues.
Drain Main Basement System is our stand-alone footer drainage system ideal for moderate wet basement problems.
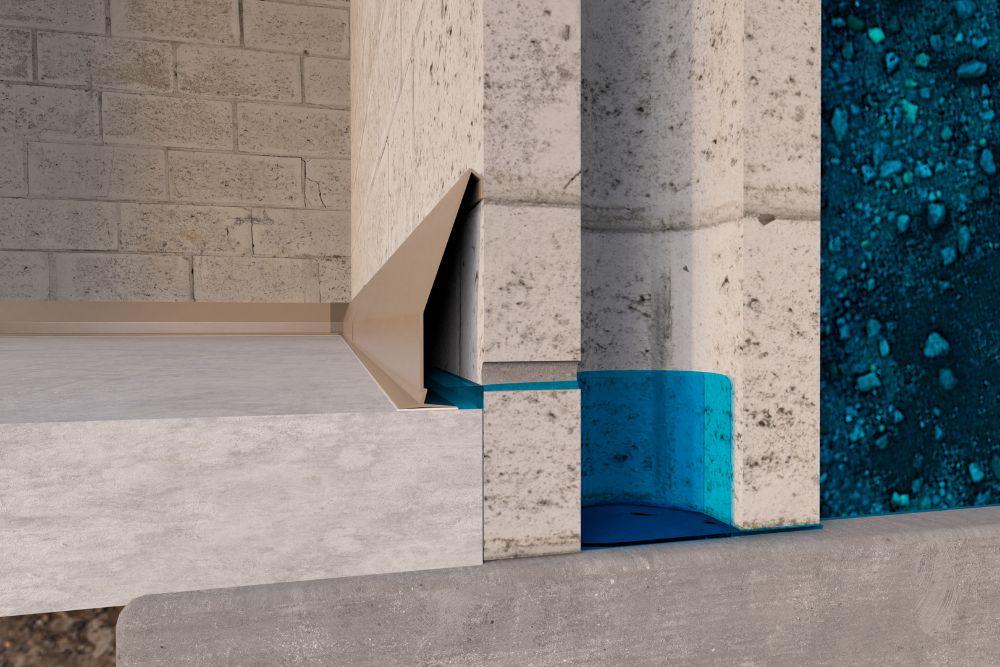
2. Stand-Alone Footer Drain System
Best for traditional foundations with moderate water issues
A stand-alone footer system is installed by removing a narrow strip of basement floor to expose the footing. It collects water at the wall-floor joint—one of the most common leak points.
How It Works:
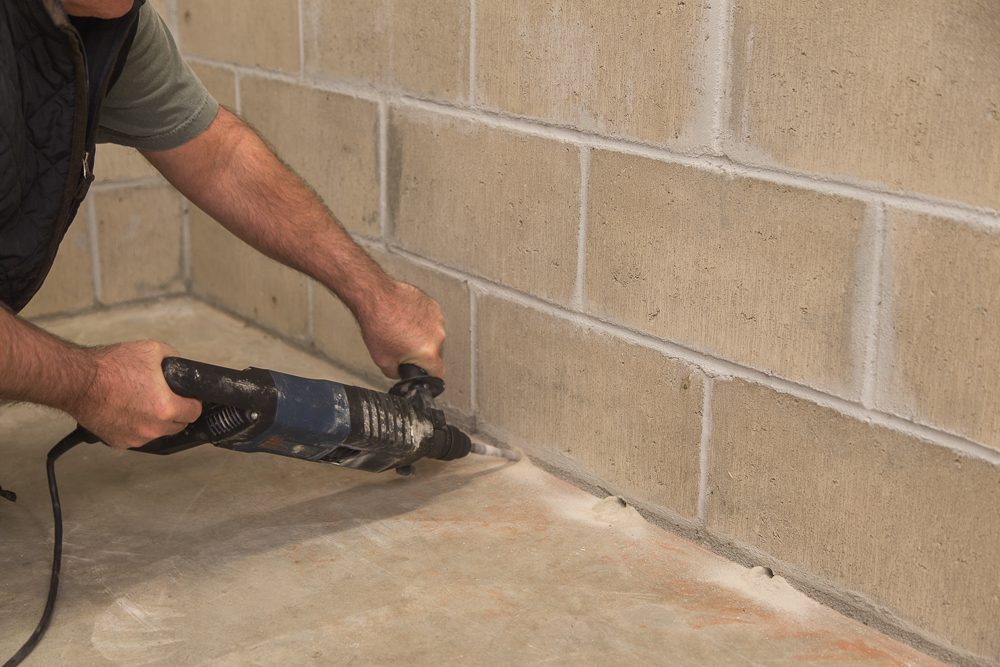
Break out a small section of the slab to expose the footing
Drill weep holes into the bottom block course to relieve hydrostatic pressure
Install the footer channel directly on the footing
Add gravel and repour concrete over the system
The system includes a small vertical fin that stays exposed, allowing it to collect water from above the slab if needed.
Ideal When:
You need a strong, reliable interior waterproofing method
Your basement floor has at least 3 inches of concrete above the footing
Limitations:
If the floor is too thin, repouring concrete can create a weak, “eggshell” surface that may crack over time. In this case, you should consider option 3: drain tile system with a low-profiles footer board.
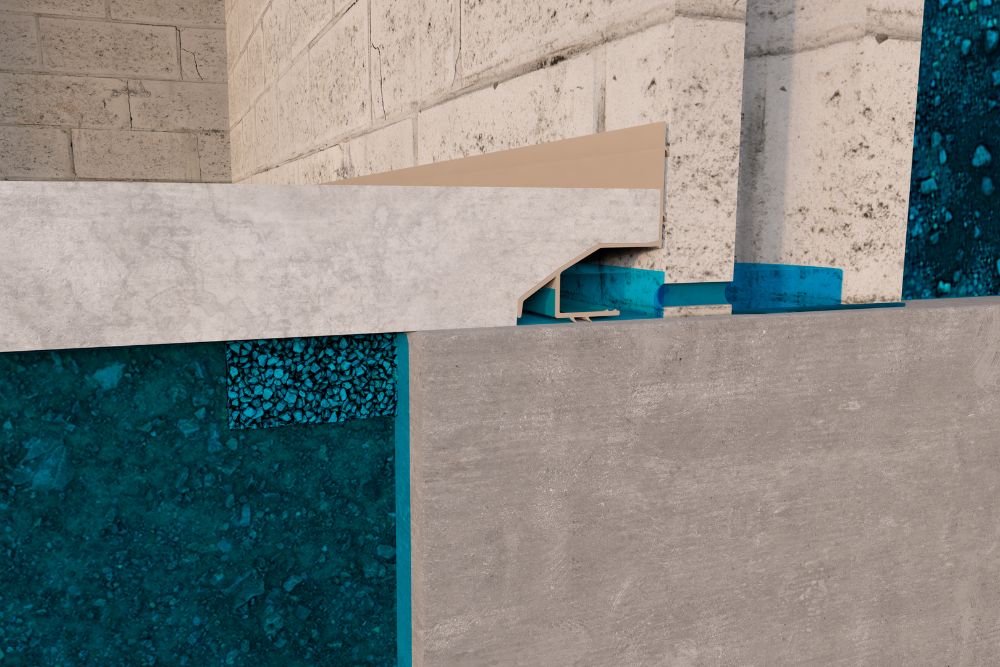
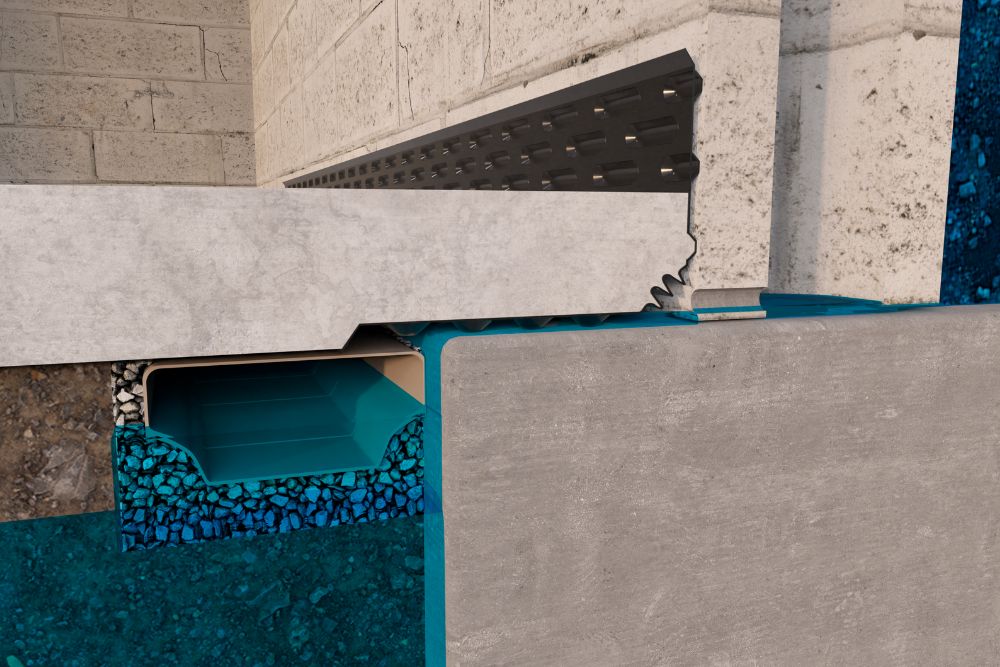
3. Drain Tile System With Low-Profile Footer Board
The Gold Standard of Basement Waterproofing
A full interior drain tile system is widely considered the best basement waterproofing method available for existing homes. It provides long-term protection against hydrostatic pressure and chronic water intrusion.
How It Works:
Break out the basement floor 6–12 inches from the wall
Expose the footing
Install gravel in the trench
Place drain tile next to the footing, sloping toward the sump pump pit
Install an L-shaped dimple board on top of the footing to direct wall seepage into the drain tile
Cover with gravel and repour concrete
Types of Drain Tile:
Corrugated perforated pipe: Cost-effective but requires deeper trenching and careful slope
The most effective basement waterproofing method is the one tailored to your foundation type and water problem. While exterior improvements are always the first step, many existing homes benefit greatly from an interior system—especially a full drain tile installation.
If you’re exploring basement waterproofing options or looking for professional-grade materials trusted since 1965, our team at Waterproof.com is here to help.
Frequently Asked Questions (FAQ)
1. What is the most effective basement waterproofing method?
The most effective and widely recommended method is an interior drain tile system with a low-profile footer board. It manages hydrostatic pressure, handles high water tables, and provides long-term protection—making it the gold standard for basement waterproofing.
2. Do I need exterior basement waterproofing if I install an interior system?
Not always. While exterior improvements like grading and gutter extensions should always be addressed, most existing homes achieve full waterproofing with a properly installed interior drain tile or footer system. Exterior systems can be expensive and difficult to install on finished homes and if they fail, you have to go inside the basement to waterproof.
3. How do I know which basement waterproofing method is right for my home?
It depends on your foundation type, the severity of water intrusion, and your budget. Minor seepage may be solved with simple exterior water management options mentioned above and/or a baseboard system, but chronic leaks or high water tables typically require a stand-alone footer system or full drain tile installation. If water rises several rows high in block walls, a drain tile system is usually the best choice.
Lift the green lid and rotate it until it releases.
Remove the lid from the center post.
Align the tabs on the bottom of the center post with the matching openings in the bottom of the pot.
Push down and give the center post a quarter turn.
Locate the prong near the top of the center post.
Align the prong with the notch in the lid.
Pop the lid back into place.
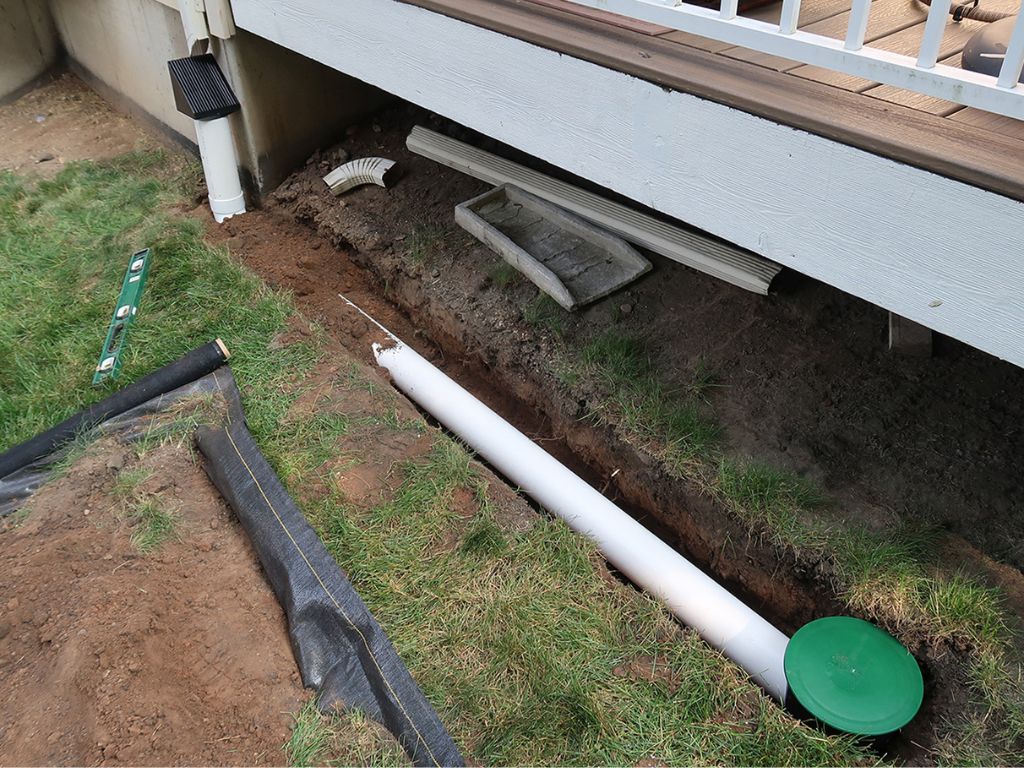
Maintaining your underground downspout system is key for effective exterior waterproofing and drainage around your home. Checking and replacing components like the downspout lid can help prevent clogs and keep water flowing away from your foundation. For the full installation guide for the complete UnderGround Downspout kit that includes the bubbler pop-up in the yard and debris filter visit this page.
The cost of basement waterproofing can vary widely depending on the method you choose and the severity of the problem. The average cost to waterproof a basement can range anywhere from $2,000 to $15,000 or more. Simpler solutions, like applying waterproof paint or installing a sump pump, may cost a few hundred dollars, while more extensive projects, such as installing an exterior drainage system, can reach the higher end of the spectrum.
Factors Affecting the Cost of Waterproofing a Basement
Several factors influence the cost of waterproofing a basement, from the type of water intrusion to the size of the space. Here’s a breakdown of key considerations:
1. Source of Water
The origin of the water problem—whether it’s condensation, wall cracks, seepage, or hydrostatic pressure —affects both the method and the cost of waterproofing. Simple fixes, like a dehumidifier for condensation, are less expensive than foundation repairs.
2. Basement Size and Layout
Larger basements or those with complex layouts will be more expensive to waterproof due to the increased material and labor needs. Costs typically scale with square footage.
3. Soil and Moisture Conditions
Soil moisture levels and type around your home can increase costs, especially in flood-prone areas where more extensive waterproofing methods could be needed.
4. Foundation and Wall Condition
Cracked or damaged foundation walls require repairs, which can add to your overall cost. A solid, intact foundation allows for less expensive solutions.
5. Geographic Location
Waterproofing costs vary based on local labor rates and the flood risk of your area. Homes in high-risk areas may need more robust and costly waterproofing systems.
6. Preventative Measures
Simple actions like adjusting downspouts and filling low spots can reduce water intrusion, helping to lower the overall cost of basement waterproofing.
Basement Waterproofing Costs and Methods
The cost of waterproofing a basement depends on the method used. Here’s a breakdown of the most common interior and exterior waterproofing solutions and their associated costs.
CONDENSATION
Condensation is when water droplets in humid air comes in contact with cold surfaces turning the vapor into water. Condensation often collects on concrete walls and floors. A low cost remedy to this type of basement condition is simply add a box fan to your basement to help circulate the air, which prevents the vapor from condensing and turning into liquid. You could also want to add a dehumidifier to the basement to collect the moisture from the air. For most basements you want to keep the humidity level at or below 50% relative humidity. When you go above 80% humidity your chances of mildew mold growth greatly increase.
Leaky wall cracks are most commonly found in poured wall foundations. Vertical wall cracks can be fixed by applying a sealant to the crack, like our CRACK Foundation Repair. This will seal off the crack preventing water from entering through the wall crack. It’s important also take preventative measures to keep water from entering your basement and for that you need to take a look outside your home to address key areas that drive water into your basement every time it rains or snow thaws (read the preventative tips above for more info).
Total Cost: $45 to $205 $30 for CRACK Foundation Repair + $15 for simple tools like a putty knife, wire brush & caulking gun. You might also want to add downspout extension around your home to divert the water, which will help prevent pooling water around the foundation. We calculate about $40 per downspout to install an UnderGround Downspout and PVC pipe.
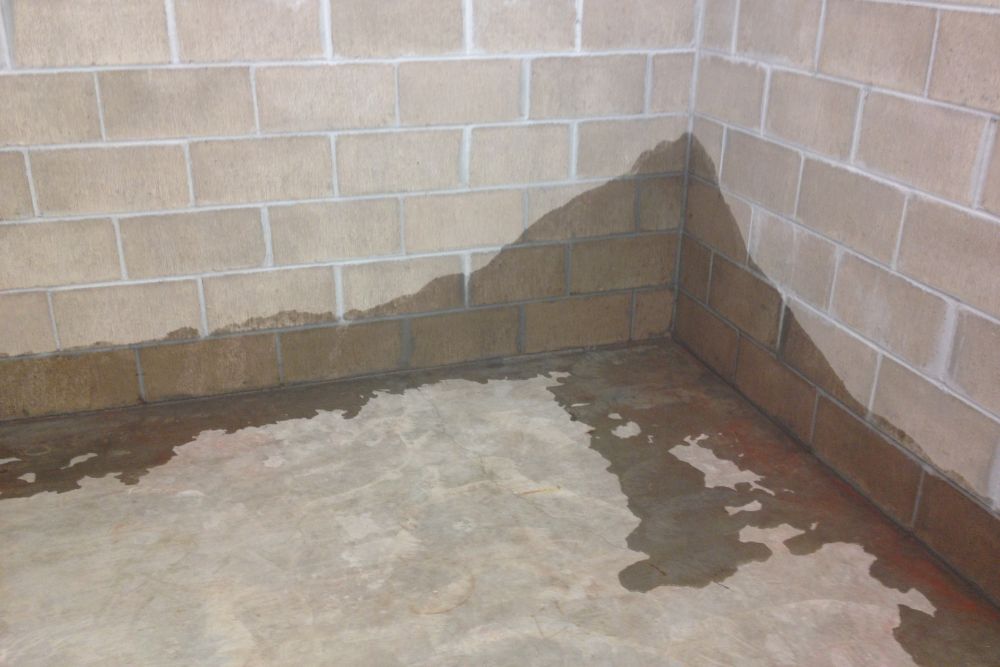
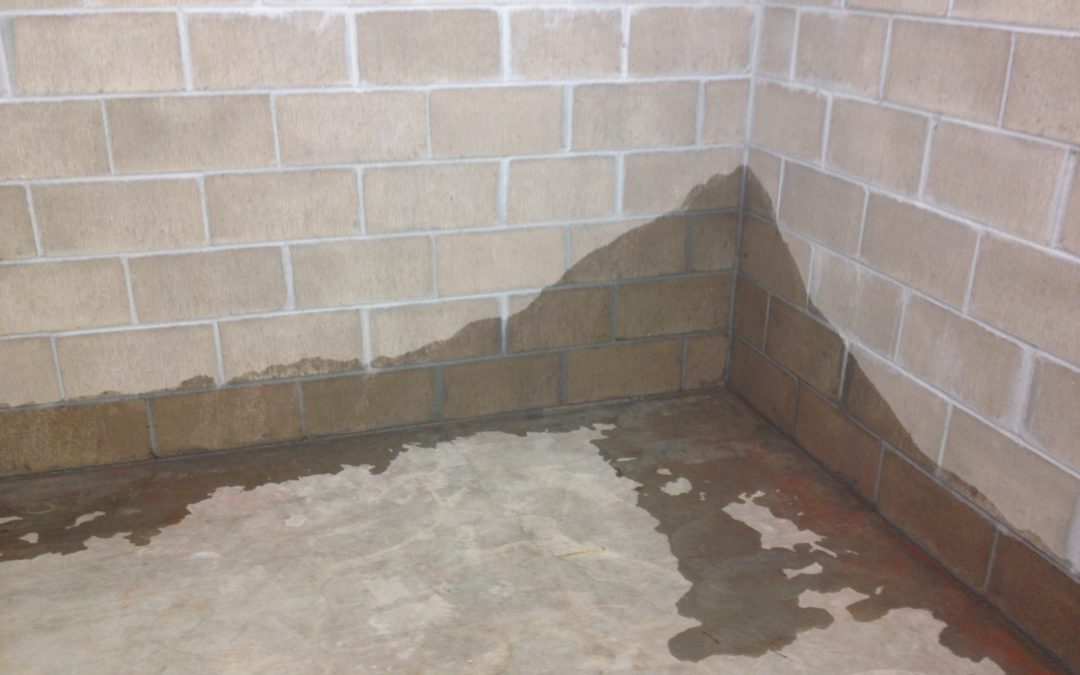
WATER SEEPAGE WHERE FLOOR & WALLS MEET
The joint where the floor and walls meet is commonly called the “cold” or “cove” joint. This is the most common source of a wet basement, affecting nearly 90% of all wet basements. As hydrostatic pressure around your home’s foundation builds up it forces exterior water into the basement through the open cold joint.
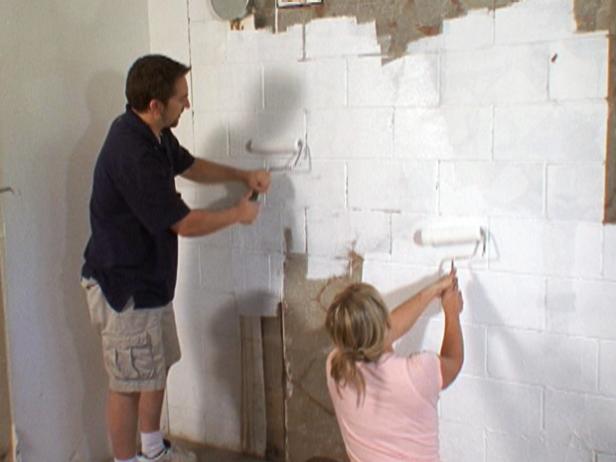
Many do-it-yourself homeowners initial idea is to find a way to push back or stop the seepage with waterproofing paints or hydraulic cement. These methods are cheap, “quick fixes” to a leaky basement, but won’t last longterm and often create a bigger problem as water will build up higher in the walls and can find new ways into the basement. Waterproofing paints typically cost around $50 a gallon and require a great deal of prep work labor to apply. Hydraulic cements cost around $10 for a 10 lb. pail, which can be very appealing to a homeowner looking for a cheap fix, but they often regret their choice when water begins to build up in their walls and popping and cracking the hydraulic cement. These bandaid quick fixes should be avoid because they will not solve the problem.
The most expensive basement waterproofing cost and option is exterior waterproofing. This requires a great deal of labor and stress on your home and it has several drawbacks when adding to an existing home. Exterior waterproofing relies on a waterproof membrane sprayed or brushed onto the exterior face of a home’s foundation walls to create a water barrier. The best time to apply an exterior waterproofing membrane is during construction of the home. This can act as a preventative measure to help keep moisture out of the basement.
Exterior waterproofing isn’t an ideal remedy for an existing home, as you would need to excavate around your home to exposed the foundation walls. The biggest drawback to this option for an existing home is the high expense and possible damage and disruption it can cause to your home. Exterior waterproofing membranes and drain tiles are limited in their effectiveness. Most exterior drain tile systems clog overtime with silt, which leaves them useless and inaccessible.
Total Cost: $15,000 to $35,000 Exterior waterproofing is the most expensive and has limited effectiveness on existing homes.
Interior basement waterproofing systems are the best approach to waterproofing an existing home. There are 3 main interior waterproofing options:
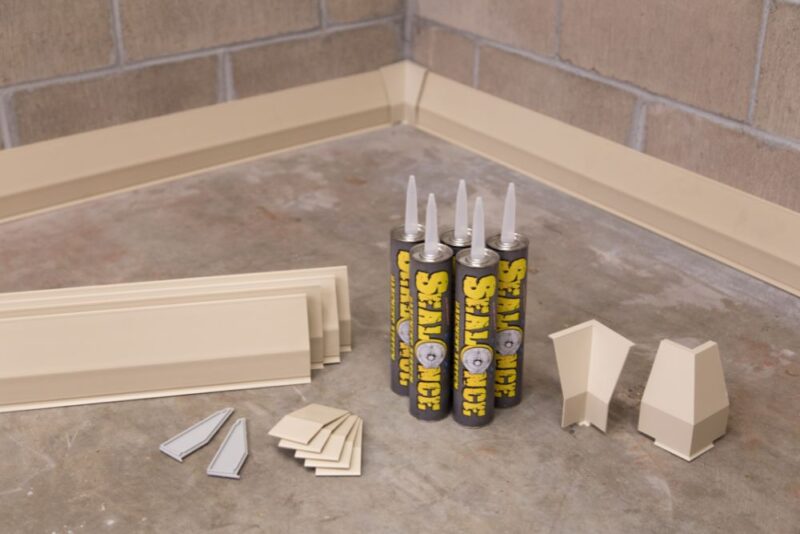
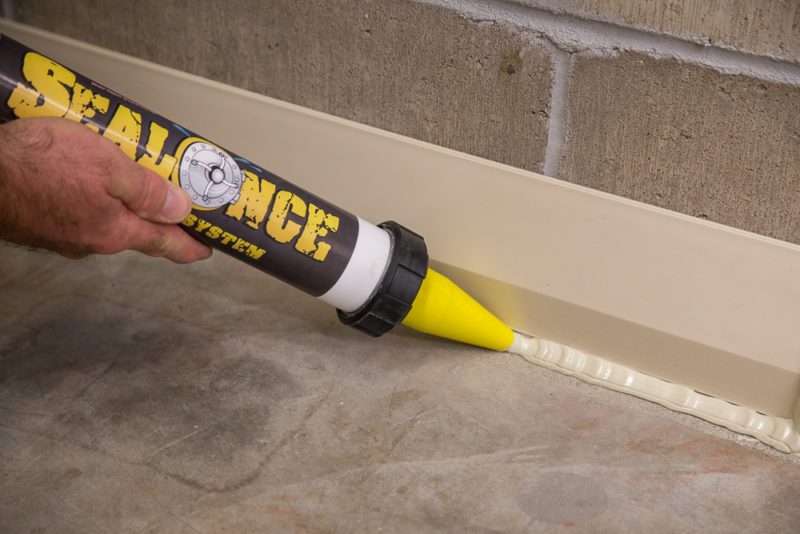
1. Above floor baseboard channels are the best do-it-yourself waterproofing option for homeowners because they tap into hydrostatic pressure versus common do-it-yourself methods that try to hold back or plug a wet basement. An above floor baseboard channel doesn’t require busting up your basement floor, which makes a do-it-yourself system friendly. Many contractors install these system in monolithic basements, which means the basement walls and footing are one. You do not want to bust up a monolithic basement floor. Above floor baseboard channels, like the SealOnce™ Basement System, is very effective option (and affordable) and will dry up a basement who’s water source is through the cold joint.
Total Cost: $6 per ft (DIY Installation) to $30 per ft (Contractor Installation) SealOnce™ Basement System is a permanent do-it-yourself fix to a wet basement. You will save yourself thousands of dollars installing the system yourself, but many contractors offer these non-invasive channels.
2. Footer drainage systems are a favorite among contractors because it requires less labor then old-fashioned pipe and gravel and is extremely effective. Footer drainage systems require busting up your basement floor to expose the footing, then a drainage channel is placed on top of the concrete footing around the perimeter of the basement draining into a sump pump system. A benefit to this type of system is it is not sitting in any dirt or soil that could clog the system.
Total Cost: $20 to $35 per ft Footer drainage systems are a professionally installed basement waterproofing channel that is very effective, but will cost several thousands of dollars.
3. Subfloor drain tile systems are an industry standard in basement waterproofing. These systems vary in sophistication and effectiveness. Old-fashioned pipe and gravel is very cheap in material costs, but expensive in labor costs as you need to bust up and dig very large, deep trench in a basement floor for it to be effective. Old-fashioned pipe and gravel is an effective system, but has it’s drawbacks. These systems frequently get clogged because they are sitting in dirt. They need a good deal of pitch and a lot of water in them to create flow. An old-fashioned drain tile job would likely take 2 to 4 days and would cost several thousand dollars (mostly paying for labor). The basement waterproofing industry has evolved greatly over the past few decades in the development of hybrid basement waterproofing systems that are more effective with water flow then old-fashioned pipe and gravel, and require a lot less labor. Many of these new systems come with inspection ports, giving you access to the system after its been installed to flush the system out if needed.
Total Cost: $25 to $55 per ft Subfloor drainage systems are a professionally installed basement waterproofing channel that is very effective, but will cost several thousands of dollar.
SEEPAGE THROUGH THE MIDDLE OF FLOOR
Having a leak up through the middle of your basement floor is uncommon. If you have a crack in your basement floor that is leaking you’ll want to figure out if the water is truly coming up through the floor or if the crack is being feed by the wall and cold joint area (this is most often the case). If the water is coming up through the middle of the basement floor a subfloor system is necessary to remedy this problem. A contractor will install a subfloor system around the perimeter of the basement floor and will most likely run a vein out into the middle of the basement to collect the water in the center of the foundation.
Total Cost: $25 to $55 per ft A subfloor drain tile system is necessary to remedy this type of wet basement.
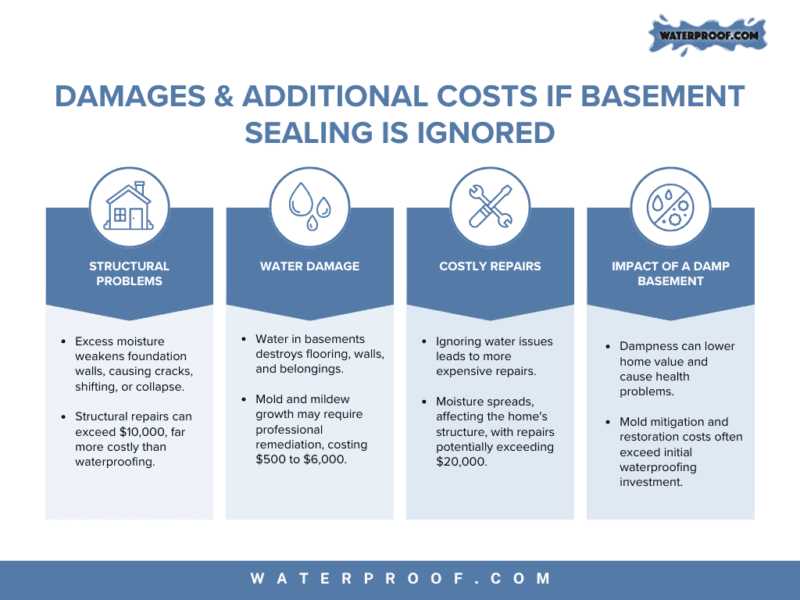
Damages and Additional Costs if Basement Sealing is Ignored
1. Structural Problems
Excess moisture can weaken your foundation walls, leading to cracks, shifting, and even collapse. Repairing structural damage often costs far more than proactive waterproofing, sometimes exceeding $10,000.
2. Water Damage
Unchecked water can destroy basement floors, walls, and personal belongings. Water damage can also lead to harmful mold and mildew growth, which requires professional remediation and can cost between $500 and $6,000, depending on the extent of the damage.
3. Costly Repairs
The longer water issues are ignored, the more expensive the repairs become. Moisture can spread to other parts of the home, affecting structural integrity and requiring larger-scale repairs that could easily exceed $20,000.
4. Impact of a Damp Basement
A damp, musty basement can reduce the overall value of your home and cause long-term health problems for residents. The cost of mitigating mold and restoring your basement’s usability far outweighs the initial investment in waterproofing.
Addressing waterproofing early prevents these issues, saving you from much larger repair bills down the line.
Preventative Tips to Keep Your Basement Dry
Before diving into extensive waterproofing projects, there are several preventative steps you can take to minimize water issues and maintain a dry basement. These measures are simple and cost-effective, helping reduce the likelihood of needing major waterproofing work later on.
1. Inspect and Maintain Gutters and Downspouts
Ensure your gutters are clear of debris and properly directing water away from the foundation. Downspouts should extend at least 8 feet away from the house to prevent water from pooling near your basement walls.
2. Grade Your Landscape
Check the grading around your home’s foundation. If the ground slopes toward the house, water will naturally flow into the basement. Filling in low spots and creating a slight slope away from the foundation can help keep water at bay.
3. Seal Cracks in Foundation and Walls
Regularly inspect your foundation and basement walls for small cracks. Use hydraulic cement or waterproof coatings to seal these cracks, preventing water from seeping in.
4. Extend Downspouts and Redirect Water
Use downspout extensions to ensure water is directed away from the foundation. Additionally, avoid allowing water to pool around sidewalks or patios near the home, as these can cause water to seep toward your foundation.
5. Maintain Proper Drainage Systems
Make sure that your home’s drainage systems, including sump pumps and French drains, are functioning properly. Periodically test these systems to ensure they can handle heavy rainfall or flooding events.
By implementing these simple tips, you can often avoid the need for costly waterproofing solutions, especially in areas with minor water intrusion.
Why Choose Waterproof for Your Basement Waterproofing Needs
When it comes to basement waterproofing, you want a solution that not only addresses current issues but also protects your home in the long run. With over 50 years of experience, Waterproof is the trusted choice for homeowners and contractors alike. We offer reliable and proven waterproofing systems that fix moisture problems permanently, whether you’re dealing with minor leaks or major flooding.
At the end of the day, hiring a waterproofing contractor brings a heavy price tag. With the cost of labor for these repairs, many homeowners find a better solution in DIY waterproofing products. If you plan to waterproof your basement yourself take a look at our DIY basement waterproofing guide for helpful tips and advice. If you’re looking for a quote for your basement project visit our SealOnce™ Basement System.
At Waterproof, we understand that each basement is unique. That’s why we provide tailored solutions to meet your specific needs.
Don’t wait for your wet basement to become a bigger problem. Let us help you find the right solution to protect your home and provide peace of mind. Contact Waterproof today.
So what’s next after a heavy rain and your basement is flooded with water? The good news is surface water, wall seepage or back-flow from sewer lines typically causes little to no structural damage to your basement or foundation. The water inside the basement braces the walls against the pressure of outside water and waterlogged soil.
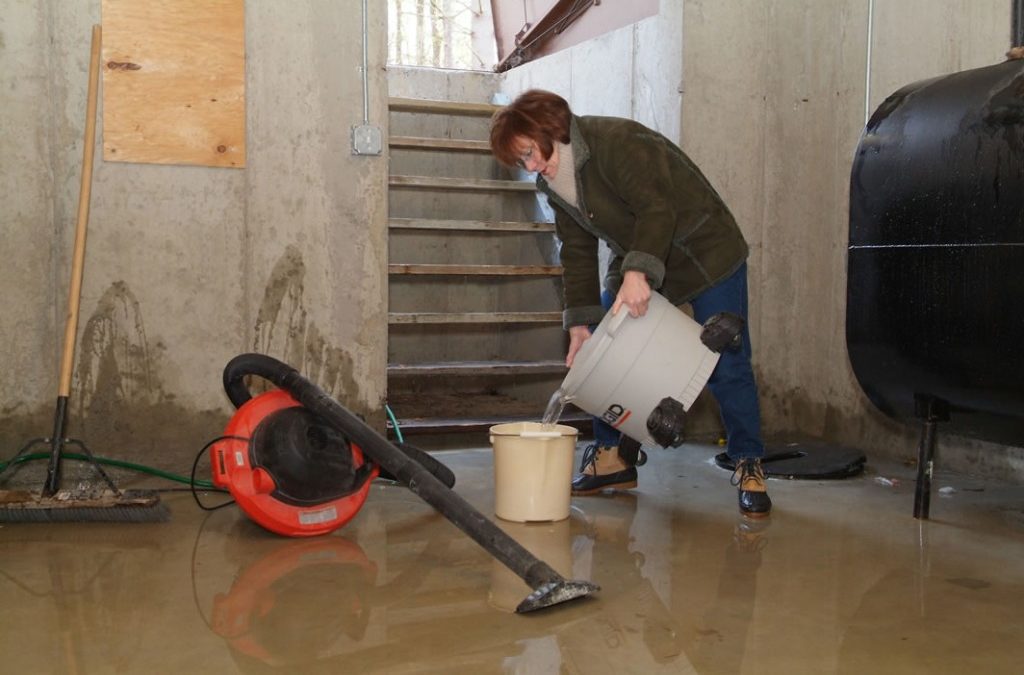
1. Drain water out of a the basement
Wait to drain out basement water until the water level outside the home has decreased and a majority of it is gone. This will prevent the basement walls from pushing in or buckling and prevent the basement floor from heaving. If there is a large amount of water in the basement or if there is no basement drain, you may need to buy or rent a sump pump to get rid of the standing water.
If your electrical panel is located in an area of your home that has been flooded, you will be unable to use an electric sump pump, unless you use a pump driven by a 12-volt auto battery. Stop pumping when the two water levels become equal. Pump the basement water out at the same rate at which the flood waters recede. This will keep the integrity of your foundational structure in-tacked.
2. Clean up and remove debris
Once you have drained the basement water you can being the process of cleaning your basement. Remove the silt and dirt residue from the basement walls with a high-pressure hose. Next, using a shovel collect all the mud and debris off the basement floors to encourage your basement to dry out. If the stains are stubborn and do not come clean with the hose, use a stiff bristle brush and household detergent to clean. Begin scrubbing at the top of the basement wall and work all the way down to the floor. Rinse often with clear water.
Begin drying your basement immediately. This will decrease the ability of mold and mildew growth that can cause an already unfortunate situation to become much worse. If you are sensitive to mold or mildew or see any mold in your basement, be sure to wear a mask or respirator containing an appropriate filter. Open all doors and windows to allow moisture to flow outside the basement. Fans will help to direct the moisture out the open doors and windows. A dehumidifier will help speed up the drying process by removing excess moisture in the air.
3. Install a basement waterproofing system
If you basement floods after a heavy rain or snow melt it is important to install a basement waterproofing system to remedy the issue and prevent future flooding and water seepage.
Basement mold can transform from a small, hidden problem into a major crisis that threatens both property values and family health. What starts as a subtle musty odor or small dark patches can quickly escalate into a serious issue that costs thousands to remediate and poses significant health risks.
Industry studies show mold infestations can reduce property values by 10-30% and create respiratory issues, allergic reactions, and other health concerns, particularly in children and elderly residents. The Environmental Protection Agency warns that most mold has the potential to cause health problems, making prevention absolutely crucial.
The good news? With the right knowledge and proactive measures, effective mold prevention is achievable. Homeowners can create an environment where mold simply cannot thrive through:
Proper waterproofing
Ventilation
Moisture control techniques
This expert guide covers:
Key warning signs of basement mold development
How moisture and poor ventilation create ideal mold conditions
Professional-grade prevention strategies for DIY implementation
Lasting solutions that protect both home and health
The critical role of basement waterproofing in mold prevention
Understanding Basement Mold: Causes and Risks
Basement mold poses significant risks to both home structures and occupant health. Understanding what causes mold growth and its associated risks is crucial for maintaining a mold-free basement environment.
Several key factors contribute to mold growth in basements. The primary culprit is excess moisture, which can manifest through multiple channels:
Seepage through cove joints (where basement walls meet the basement floor)
Poor air circulation trapping humid conditions
Hydrostatic pressure forcing groundwater through concrete walls (in areas with high water tables or poor drainage)
The health problems from mold exposure are significant and shouldn’t be underestimated. Common health effects include:
Immediate Symptoms:
Respiratory problems (coughing, wheezing)
Throat irritation
Allergic reactions
Difficulty breathing
Chest tightness (specifically in those with mold allergies or asthma)
Long-term exposure risks are particularly severe for children, elderly individuals, and those with compromised immune systems, potentially leading to chronic respiratory conditions (Mayo Clinic Mold Allergy).
Key warning signs include:
Black, green, or white spotting on walls and floors
Water damage or staining on surfaces
Peeling or bubbling paint and wallpaper
Distinct musty odor intensifies in humid weather
Persistently damp surfaces or visible water vapor
Warped wood or degrading organic material
These warning signs indicate underlying moisture issues that require immediate attention. Addressing problems at their source, rather than simply treating visible symptoms, is essential for effective mold prevention and remediation.
Essential Prevention Strategies
Since 1965, we’ve learned that preventing mold growth comes down to three critical areas of focus in basement waterproofing.
Moisture Control Basics
Humidity Control
The foundation of mold prevention starts with maintaining proper humidity levels
Your basement’s relative humidity should stay between 30-50% – anything higher creates ideal conditions where mold spores thrive
Install a high-quality digital hygrometer to monitor these levels consistently
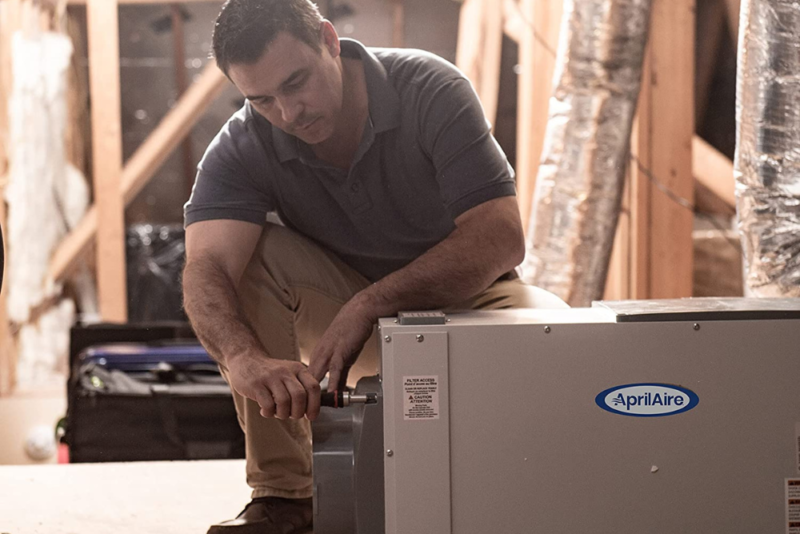
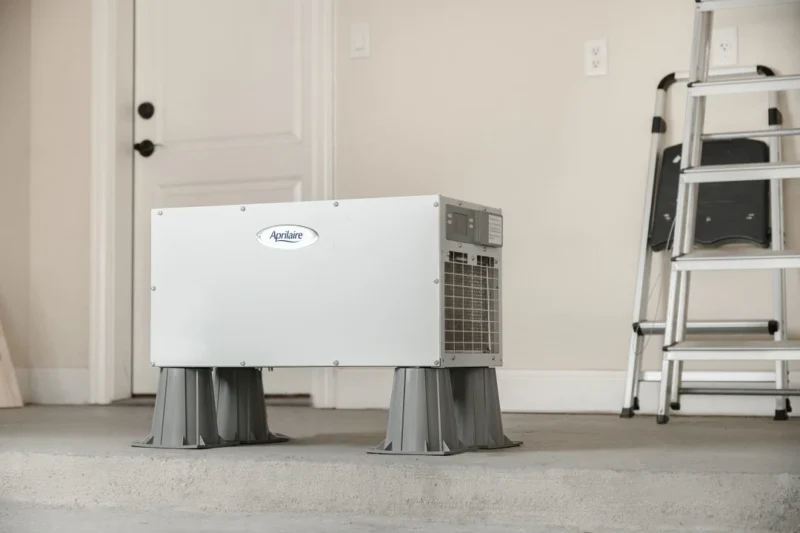
Dehumidification
A properly sized dehumidifier is your first line of defense against excess moisture
For most basements, a unit that removes 70 pints of moisture per day is ideal
Position it centrally and ensure it drains continuously to prevent overflow
Set it to maintain 45% humidity for optimal results
Ventilation
Proper ventilation is equally crucial
Install an exhaust fan system that moves stale, humid conditions outside while bringing in fresh air
Consider adding ceiling-mounted fans to keep air circulating, especially in corners where moisture tends to accumulate
External Prevention Measures
The best defense against basement moisture starts outside your home’s foundation.
External Moisture Protection
Ensure your property has proper drainage systems in place
French drains can provide additional protection in areas with poor natural drainage
Landscape Grading
Regular maintenance of your landscape grading is essential
The ground should slope away from your foundation at a rate of about 1 inch per foot for at least 6 feet
Check this gradient annually, as soil can settle over time
Indoor Prevention Methods
Air Circulation
Inside your basement, maintain consistent air circulation using strategically placed fans
Pay special attention to corners and areas behind furniture where air can stagnate
Keep your basement temperature steady – sudden temperature changes can lead to condensation and mold growth
Regular Inspection
Conduct monthly inspections of your basement’s trouble spots
Look for water leaks, check for musty odors, and examine pipes for condensation
Early detection of moisture issues can prevent major mold problems down the line
Overall Approach
These prevention strategies represent a proactive approach to basement moisture control
When implemented together, they create an environment where mold simply can’t take hold
Remember, maintaining a dry basement is far easier and more cost-effective than dealing with a mold infestation after it occurs
DIY Solutions and Preventive Measures
Before considering costly professional services, there are several effective strategies you can implement to prevent excess moisture and mold growth in your basement:
Add weep holes at floor level to relieve hydrostatic pressure
Direct water to existing sump pump or floor drains
Use moisture barriers on concrete walls to prevent water vapor penetration
Key DIY Steps:
Clean and prepare basement surfaces thoroughly
Install proper drainage channels
Apply waterproof coating to walls
Ensure proper ventilation and air circulation
Essential Tools and Materials:
Waterproofing channel systems
Moisture barriers
Waterproof adhesive
Basic tools (hardware store supplies, drill, level)
Cleaning supplies
Cost-Effective Prevention:
Maintain gutters and downspouts
Grade soil away from home’s foundation
Install underground downspout extensions
Use dehumidifiers in high humidity seasons
Most basement moisture issues can be resolved through these DIY methods.
When to Call a Professional
While many basement waterproofing projects can be handled as DIY, certain situations require professional expertise:
Structural foundation issues
Severe water leaks and infiltration problems
Complex drainage system installations
When DIY solutions haven’t resolved the mold problem
If you notice cracks in foundation walls
When mold growth persists despite prevention efforts
Professional waterproofing contractors bring specialized equipment, extensive experience, and warranty-backed solutions. While more expensive than DIY, professional mold remediation may be necessary for lasting protection in challenging situations.
Remember: The key to successful waterproofing is addressing the water source rather than just treating symptoms. Focus on proper drainage and pressure relief for lasting results.
Maintaining a Mold-Free Basement
After installing proper waterproofing solutions, maintaining a mold-free basement requires vigilant monitoring and regular maintenance. A systematic approach to basement mold prevention will ensure your waterproofing investments continue to protect your home’s foundation for years to come.
Monthly Inspection Checklist:
Check wall-floor joints, window wells, and pipe penetrations for moisture
Test sump pump operation and backup battery charge
Look for warning signs: musty odors, water stains, or pipe condensation
Seasonal Maintenance Tasks:
Spring: Clean gutters and ensure downspouts direct water 8-10 feet from foundation
Winter prep: Insulate exposed pipes and seal air leaks
Rain season: Keep backup sump pump ready and maintain clear foundation drainage
Monitoring System:
Track humidity levels (30-50%) with digital hygrometer
Monitor air quality with CO2 detectors
Check drainage patterns after heavy rains
Observe sump pump cycling frequency
Need Waterproofing Solutions?
Visit Waterproof.com for industry-leading equipment, comprehensive installation guides, and expert DIY support. With over 50 years of experience, we offer complete basement waterproofing systems. Trust the experts for all your basement waterproofing needs.
A musty-smelling basement isn’t just an annoyance – it’s often a sign of underlying issues like excess moisture, mold growth, or poor ventilation. If left untreated, these issues can lead to long-term water and structural damage in your home, and even impact indoor air quality.
The good news? There are effective ways to eliminate musty odors and prevent them from coming back.
What Exactly Causes Musty Smells in a Basement?
Musty basement odors don’t appear out of nowhere – they’re usually a sign that moisture is lingering where it shouldn’t be. Understanding the root cause is the first step to eliminating that unpleasant smell for good.
Excess Moisture
Basements naturally have high humidity levels, which can create the perfect environment for unpleasant odors to develop.
Mold and Mildew Growth
When moisture lingers, mold and mildew start to grow on walls, floors, and even stored items – releasing that musty smell.
Poor Ventilation
Humid air traps moisture and odors inside, making it harder for your basement to stay fresh.
Water Leaks or Seepage
Cracks in your foundation, leaky pipes, or groundwater seepage can introduce unwanted moisture.
Absorbent Materials Holding Moisture
Items like cardboard boxes, carpets, and old furniture can trap dampness and odors over time.
If your basement smells musty, there’s a good chance one or more of these factors are at play. The key to getting rid of the odor is tackling the source – and that starts with improving airflow and moisture control.
Step-by-Step: Getting Rid of That Musty Smell
1. Improve Ventilation and Air Circulation
One of the easiest and most effective ways to eliminate musty odors is by increasing airflow in your basement. Stagnant air traps moisture, allowing odors to linger and mold to grow. You can improve ventilation by:
Open basement windows and doors to let fresh air in and allow moisture to escape
Use fans to promote air circulation
Run a dehumidifier to reduce moisture levels and keep the air dry
Proper ventilation helps dry out damp areas, preventing musty odors from forming in the first place. If ventilation doesn’t remove odors, it’s time to take the next step – deep cleaning.
2. Deep Clean Basement Surfaces
Mold, mildew, and bacteria can cling to basement walls and floors, making odors linger. A thorough cleaning will help remove these odor-causing contaminants.
Scrub concrete floors and walls with a bleach solution (3/4 cup of household bleach to a gallon of water). This helps kill mold and mildew that may be causing odor.
Let the solution sit for about 5 minutes, then rinse with clean water and dry the surfaces thoroughly. Avoid oversaturating the area, as excess moisture can make it worse.
Open windows while applying the bleach solution to speed up the drying process and reduce inhalation of the bleach.
Taking the time to deep clean your basement will not only freshen up the space but also prevent musty odors from coming back. Once everything is clean, the next step is to absorb and neutralize any remaining smells.
3. Absorb and Neutralize Odors
Even after regular cleaning, musty odors can linger in the air. Using odor-absorbing materials can help eliminate any remaining smells and prevent them from coming back.
Place a lump of dry charcoal in an open tin/metal container to absorb moisture and odors.
Use baking soda to freshen the air. Sprinkle it on basement floors or place small bowls of baking soda in different areas to help neutralize the odor.
It is recommended to wear a mask when removing the musty basement smell.
These simple steps can help reduce moisture levels and slow the process of mold and mildew growth. However, if moisture continues to be a problem, additional waterproofing measures may be necessary to keep your basement dry long-term.
Preventing Future Moisture Problems
Eliminating musty odors is only half the battle – keeping them from coming back requires long-term moisture control. Here’s what you can do:
Identify and fix any leaks – check for cracks in the foundation, leaky pipes, or signs of water seepage and repair them as soon as possible
Ensure proper drainage around your home – keep gutters clean and make sure downspouts direct away from your foundation walls
Use a sump pump to manage excess water – if your basement is prone to flooding, a sump pump can help keep it dry
Run a dehumidifier – keeping humidity levels low discourages mold growth and helps keep your basement smelling fresh
By taking these proactive steps, you can protect your basement from moisture-related issues and avoid musty smells in the future. While DIY methods help, long-term moisture control requires professional solutions – and that’s where Waterproof.com comes in.
How Waterproof Can Help
At Waterproof.com, we know that a dry basement is a healthy basement. With over 50 years of experience in basement waterproofing, we’ve created a full set of high-performing waterproofing systems designed to solve any moisture issue – whether you’re a homeowner dealing with a musty basement or a contractor looking for reliable and effective solutions for a client.
One of the best ways to control humidity and eliminate musty odors is by using a high-quality dehumidifier. We offer reliable dehumidifiers built for basements, crawl spaces, and other moisture-prone areas that efficiently remove excess humidity – helping to prevent mold, mildew, and lingering odors.
In addition to dehumidifiers, we provide:
Complete waterproofing systems, including our easy to install DIY basement waterproofing system, to remove the moisture and protect your basement long-term
Sump pump systems and drainage channels to keep water from pooling in your home
Crawl space encapsulation vapor barrier to seal out moisture and encapsulate the crawlspace or leaky basement walls
Contractor-grade tools and materials for homeowners and professionals tackling waterproofing projects
Contact Us Today
Don’t let moisture take over your basement! Explore our basement waterproofing solutions today to keep your space dry, fresh, and protected.
Water in your basement is more than just an annoyance – it’s a sign of a bigger issue: hydrostatic pressure. When excess water builds up in the soil around your home’s foundation, it creates pressure that pushes moisture through cracks in basement walls, floors, and other weak points.
Understanding hydrostatic pressure and how to manage it is essential for keeping your basement dry and protecting the integrity of your foundation walls.
What is Hydrostatic Pressure in Detail?
When heavy rain, snowmelt, or a rising water table saturates the ground, excess water collects around your home. Because soil is porous, it absorbs moisture, creating pressure that pushes against your concrete foundation. If the pressure isn’t relieved, water infiltration occurs, forcing moisture through foundation cracks, the basement floor, and the cold joint where the wall meets the floor.
Why is Hydrostatic Pressure a Problem?
Leads to Basement Water Issues – Water seeps through cracks, causing a wet basement, efflorescence, and mold growth.
Weakens Foundation Walls – The constant pressure can cause foundation cracks, shifting, and bowing walls.
Contributes to Basement Flooding – If water can’t drain properly, it pools on the basement level, leading to costly water damage.
Controlling hydrostatic pressure is critical for maintaining a dry basement environment and preventing long-term foundation problems.
Signs of Hydrostatic Pressure in Your Basement
If you notice any of the following issues, it may be a sign that water pressure is building around your home’s foundation.
Basement water infiltration through cracks, damp or discolored spots on walls, or pooling water in low areas of the basement
White, chalky residue on basement walls; an early indicator of moisture issues
Vertical or horizontal cracks in the foundation or concrete
Bowed or leaning foundation walls
Musty odors, mold, and high humidity
Ignoring these warning signs can lead to basement flooding, costly foundation repairs, and long-term damage.
How to Relieve Hydrostatic Pressure
There are several proven solutions to reduce water pressure and prevent a flooded basement.
1. Drill Weep Holes in Block Walls and Install a Baseboard System
For homes with block wall foundations, trapped water inside the hollow cells creates hydrostatic pressure inside the walls. To relieve this pressure, small weep holes should be drilled into the bottom so water can drain into a drainage system.
Once the water pressure is released, a baseboard system like the SealOnce Basement System can be installed. This above-floor channeling system collects and redirects water toward the sump pump, preventing basement flooding. A baseboard style waterproofing system is ideal for monolithic foundations or when a minimally invasive solution is desired.
2. Install a Drain Tile System for Interior Waterproofing
A drain tile system is one of the most effective ways to manage excess water around a foundation. This system consists of a perforated pipe placed in a trench along the basement perimeter, allowing groundwater to drain into a sump pit, where a sump pump removes it from the home.
3. Use a French Drain for Exterior Drainage
A French drain is a type of exterior drainage system that moves excess water away from the concrete foundation before it can build up and cause hydrostatic pressure. It uses a perforated pipe buried in gravel that redirects groundwater before it builds up around your home.
This is a great preventative measure for keeping water out of a basement, but might not solve the issue entirely. In that case, an interior drain tile system should installed (as mentioned above in #2).
4. Install a Sump Pump and Sump Pit
A sump pump is an essential part of an interior drainage system. As basement water collects in a sump pit, the pump automatically removes it, preventing water damage and further flooding.
Consider a battery backup system to keep the pump running during power outages due to a storm or severe weather.
5. Seal Foundation Cracks
Foundation cracks should be sealed in poured concrete walls to prevent water infiltration and further structural damage. Encapsulating the basement walls with a poly moisture barrier will reduce the humidity levels in the basement and allow any water seeping from the face of the basement walls to travel down behind the poly liner and into your basement waterproofing channel.
Installing a poly vapor barrier on your basement walls is much easier and more effective than applying waterproofing paints or coatings, as those can bubble and peel away over time due to hydrostatic pressure.
Contact Waterproof.com
Ignoring hydrostatic pressure can lead to serious repair costs and ongoing water damage. If you’re dealing with water intrusion, now is the time to take action.
There are several different signs of a wet basement. Checking your basement regularly for these signs will help you identify a leaky basement and address the problem before it becomes a major headache and a very expensive situation to remedy.
1. Water Stains
Water stains are the first clue to a wet, leaky basement. These stains could be along the walls or floor. These water stains could be a caused by something simple like overflowing laundry tub or you could a basement waterproofing problem as a result of water seeping in through the joint where the floor and walls meet.
2. Musty Smell
Excess stagnate moisture in a basement creates a musty smell, which can spread into your belongs stored in the basement and the rest of the home. The smell is not only unpleasant, it can be a sign that your basement is collecting water, which could lead to a big basement waterproofing problem.
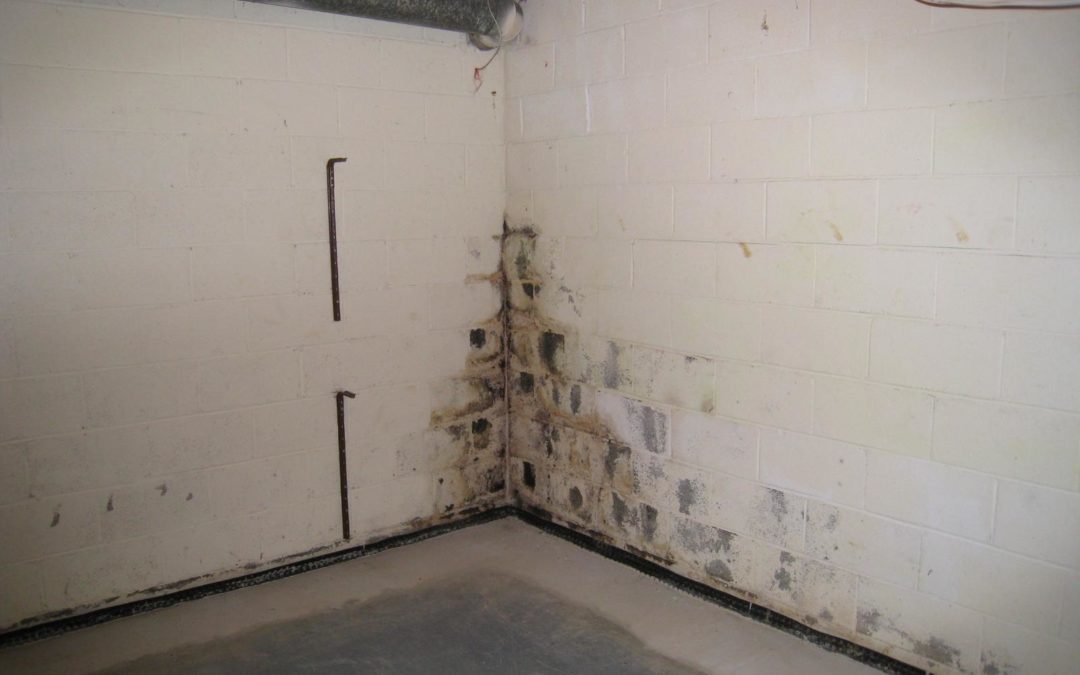
3. Mold and Mildew
Mold and mildew come in a variety of colors including black, brown, yellow or green. You should get it tested to know for sure if it is mold. Find a local mold certified specialist to assess your problem basement. Often the northwest corner of a house is known as a “cold corner” and susceptible to developing mold.
4. Efflorescence
Efflorescence produces a white or sometimes grayish ash on the basement walls. Sometimes the white-gray stains have a slight sparkle. These stains are caused by salt deposits left behind after water has evaporated. Although some of the water has evaporated, you now know that water has an entrance into your basement and could cause severe water damage.
5. Concrete Spalling
Concrete spalling occurs when water gets inside the surface of concrete, brick or stone. Salt deposits in the water settle in the surface of the basement walls causing the face of the basement walls to flake away, peel or pop off. Concrete spalling reduces the integrity of your basement walls and allows an entrance for seepage.
The most commonly overlooked solution to a wet basement is actually found outside the home. Properly managing exterior water is always the first step when fixing a leaky basement. Having gutters installed with downspouts that take roof water a minimum of 8 feet from the foundation will help prevent water from pooling in the porous soil next the foundation.
2. Not sloping the soil along the side of the home away
The immediate soil outside of your foundation remains less dense than the virgin soil 3 feet out. That is due to two reasons – first, when the soil is back filled around the newly built foundation it cannot be packed down tightly because it would cause the foundation walls to cave in. Second, warm basements radiate their heat loss into the soil around the foundation making the first 6 inches spongy and causing water to soak up faster than the heavier compacted soil further out from the home. To help prevent water from collecting in that area, fill in any depressions along the sides of the home to slope away from the home.
3. Ignoring settling service walks
Some older homes have service walks along the sides of the house that settle over time. Be sure these service walks direct water away from the foundation and don’t block water from draining.
4. Falling for the cheap paint fix
Many DIY homeowners fall for the cheap waterproofing paint fix only to be disappointed a short time later when their water problem returns. When you paint the cement walls the lime in the concrete will create a white effervescence bubble between the wall and paint. This brittle bubble will break off in shale causing a bigger mess. Waterproofing paints are cheap for a reason – they just don’t last and can’t fix a seeping basement.
5. Sealing the cold joint
Never seal the seam where the floor and walls meet. Some homeowners choose to seal the cold joint with hydraulic cement in an attempt to plug-up where the water is entering the basement. When you plug-up this joint more pressure builds up in the walls and causes the water to move to another place in the basement. When that happens remedying the wet basement becomes a lot more work, because that hydraulic cement will need to be removed before installing a basement waterproofing system.