FREE SHIPPING: On Orders Over $300 – Limited time offer!
Tiny Titan Sump Pump Kit
$389.98
Overview
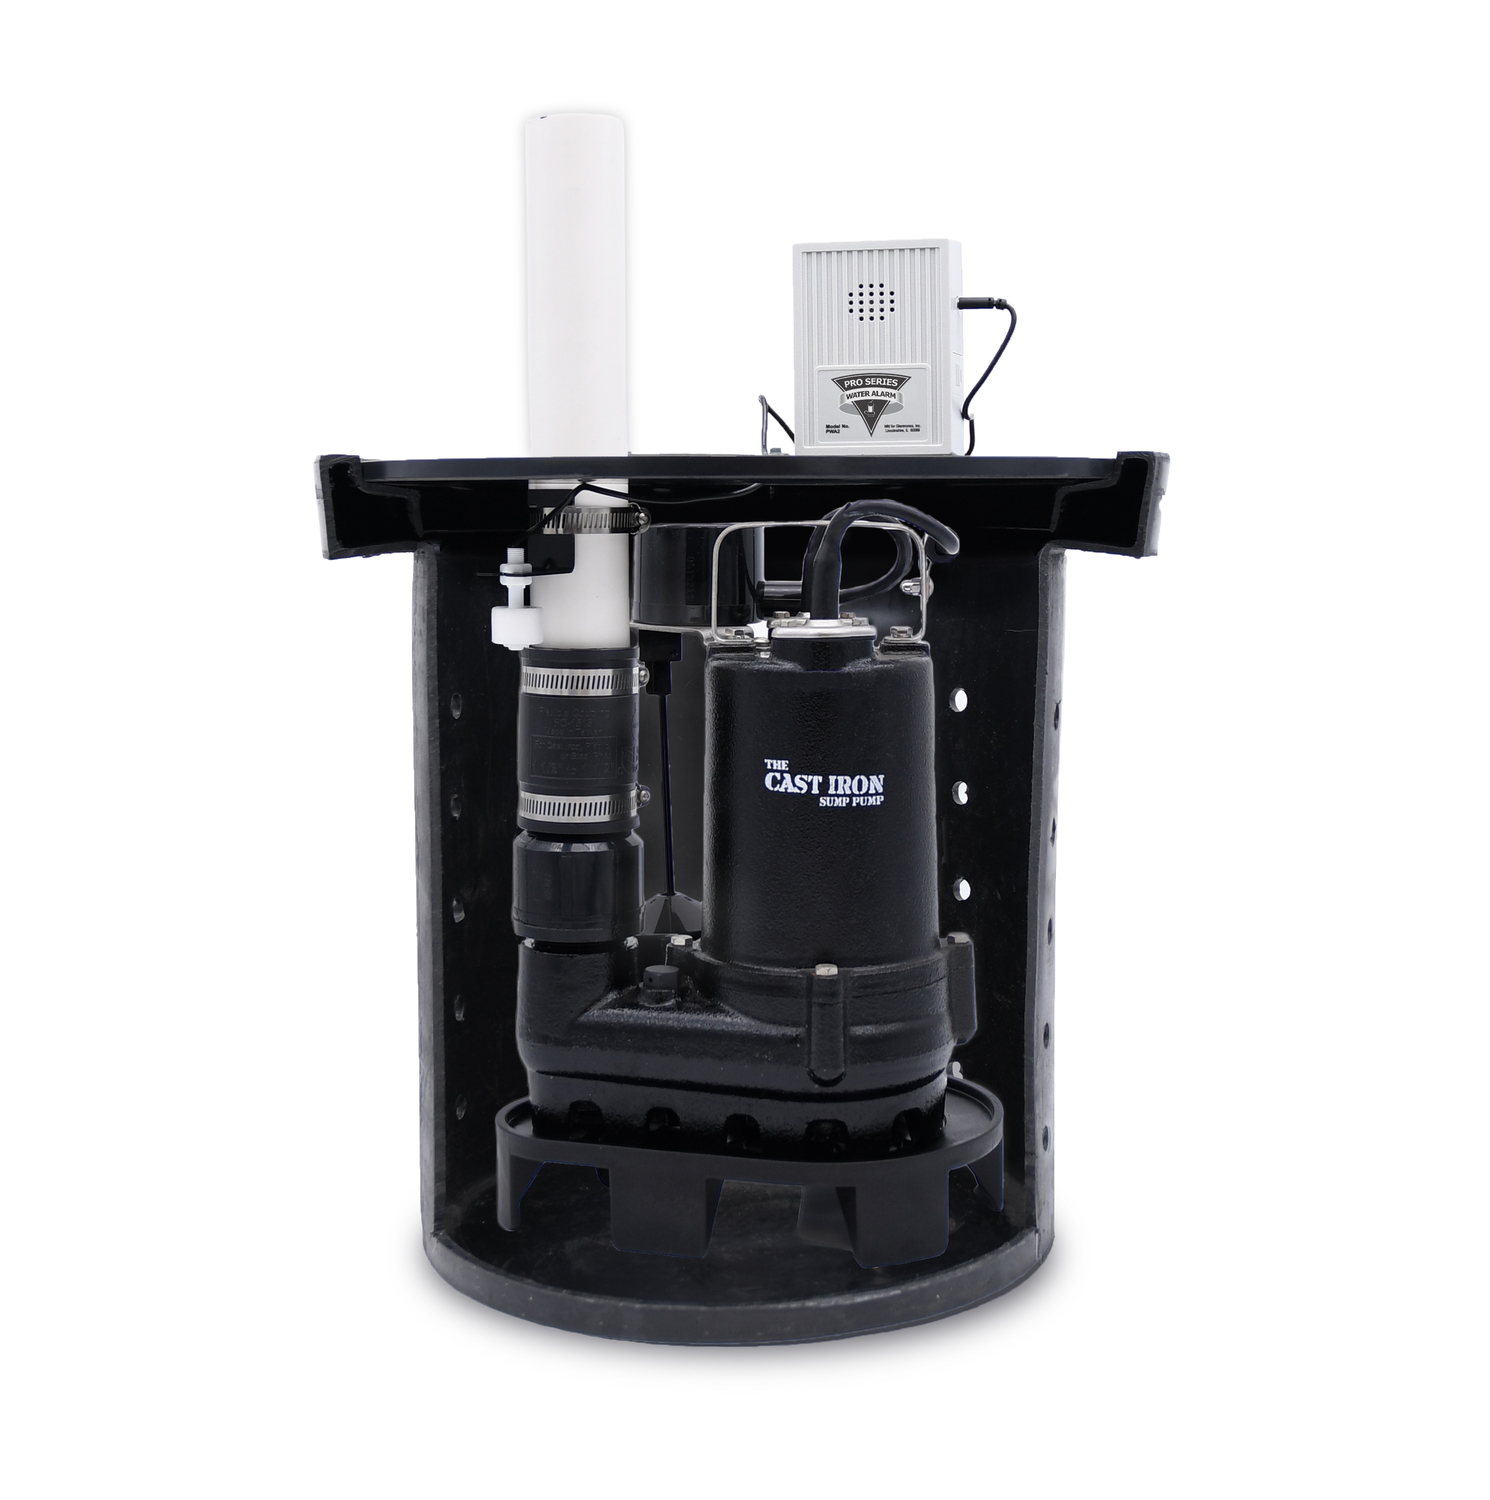
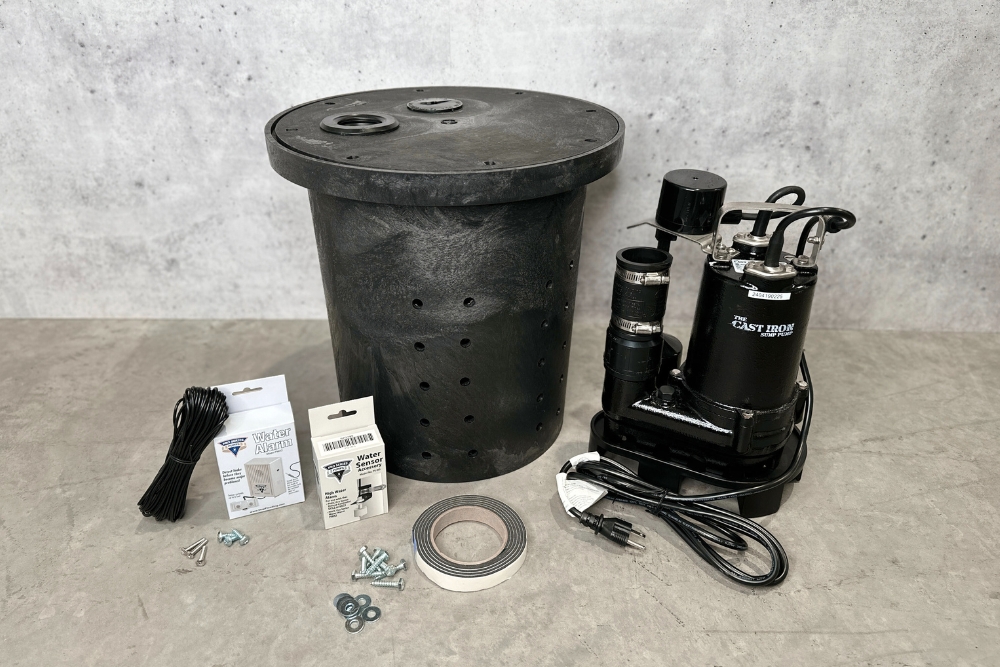
Tiny Titan Sump Pump Kit is a compact sump pit ideal drain outlet for the do-it-yourself SealOnce Basement System.
DIY Sump Pump Kit Included:
- 1/3HP cast iron sump pump
- 12.5 x 15-inch perforated structural foam basin and lid
- Built-in vertical float switch
- Water alarm
- Sump foot
- Mounting hardware (for foot, sensor and lid)
Dimensions & Specs
- Motor HP: 1/3HP
- Pump Material: Cast iron
- GPM @ 10 ft: 53.3
- GPH @ 10 ft: 3,200
- Discharge Line: 1/5″ (3/8cm)
- Amps @ 10 ft: 5
- Weight: 21.1 lbs
- Basin: Perforated structural foam
- Overall Dimensions: 16″ x 16″
- Pit Capacity: 7.3 US gallons
- Power Cord: 10 ft
- Warranty: 3-year limited warranty
Download Guides
How to Install
Tiny Titan Sump Pump Kit is Easy to Install
Sump pump installation is a straightforward process, especially with a kit like the Tiny Titan. Installing the Tiny Titan is a simple process as it comes preassembled and ready to install. Simply set the sump basin in a pre-dug pit, connect your basement waterproofing drainage system to the pit, connect the 1/3HP pump to your 1-1/2″ PVC pipes to carry the water out of your home, and plug the sump pump into your power source. The most important part is ensuring the discharge pipe directs water safely away from your home. We recommend having the water discharge at least 8 feet out from the home’s foundation to prevent water from re-entering the basement. Discharge your sump pit into our underground drainage pop-up emitter for a concealed drainage solution in your yard. Many homeowners can easily tackle this as a DIY project, but professional help can ensure proper setup and long-term reliability. Once installed, your sump pump works automatically to keep your space dry and protected.
For more installation details, check out our guide.
Why Choose the Tiny Titan Sump Pump?
The Tiny Titan Sump Pump is the perfect choice if you're looking for an easy, reliable way to protect your home from water damage. With its compact design, it fits seamlessly into small spaces, making it ideal for basements or crawl spaces. The powerful 1/3 HP cast iron pump works hard to keep your home dry, while the built-in float switch and high water alarm give you peace of mind during heavy rain or storms. Plus, it's designed for simple DIY installation, so you can set it up quickly without extra hassle. Whether you're preventing a flooded basement or just want to add value to your home, the Tiny Titan has you covered.
Sump Pump: Frequently Asked Questions
- What is a sump pump?
- A sump pump is a mechanical device that prevents water buildup in areas like your crawl space or basement. It collects water in a specially designed sump pit and pumps it safely away from your home. This helps protect your property from flooding and water damage, especially during heavy rain or high groundwater levels.
- Do I need a sump pump?
- If you're a property owner dealing with water damage, a flooded basement, or frequent storm water buildup during heavy rain, a sump pump can be a valuable addition. It helps protect your home by removing excess water before it causes costly damage or mold growth. Beyond protection, installing a sump pump can also increase your home's value by giving potential buyers peace of mind, knowing the property is safeguarded against flooding. It's a smart investment for both safety and resale appeal.
- Do I need a sump pump?
- A sump pump removes excess water by collecting it in a sump pit and pumping it out through a discharge pipe. As the water level rises, a float switch or pressure sensor detects the change, triggering the pump to activate. The pump uses centrifugal force to create pressure, pushing the sump pump water through the discharge pipe and away from your home’s foundation.
- What are the types of sump pumps and which one is right for me?
- There are a few main types of sump pumps to consider:
- Pedestal Sump Pump: A pedestal pump has a motor mounted above the sump pit, making it easy to access and maintain. It’s ideal for areas with lighter water issues but can be noisier than other options.
- Submersible Sump Pump: Designed to sit inside the sump pit, this pump operates underwater, making it quieter and more efficient for homes with significant water intrusion, like a finished basement or frequently flooded areas.
- Battery Backup Sump Pump: This backup pump kicks in during power outages, offering extra protection when storms knock out your electricity. It’s a must-have backup system in homes prone to flooding during heavy rain.
- There are a few main types of sump pumps to consider: