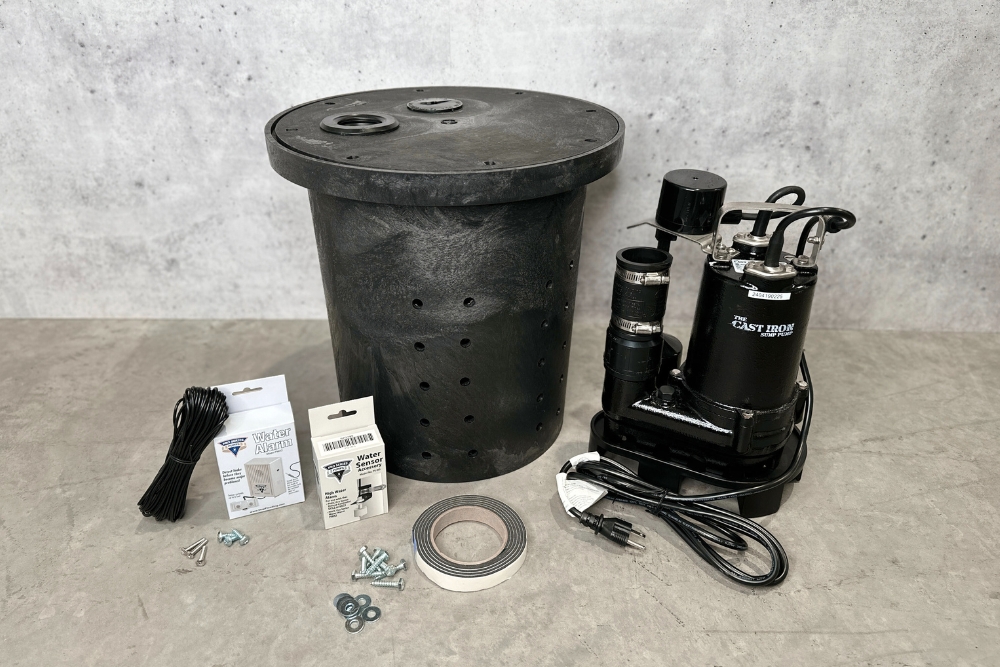
Sump Pump System Installation

Compact, yet rugged sump pump system, plus it’s easy to install.
The Tiny Titan Sump Pump Kit combines the protection of the industry standard cast iron 1/3HP sump pump in a compact basin for minimal labor with maximum protection.
A quality sump pump system is essential for homeowners looking to safeguard their basement against water damage and ensure a dry, secure living space. This powerful tool efficiently collects and redirects water away from your home’s foundation, preventing flooding during heavy rains or plumbing leaks.
Step 1: Begin by choosing a location for your sump pit. It’s ideal to choose a location based on the best place to discharge the water outside of your home. Place the basin upside down on the floor no closer than 14” from the wall. Trace the circle onto the concrete floor with a marker. This will ensure you don’t run into your basement footing when digging your hole for the basin.
Step 2: Using a rotary hammer, drill a ring of 1/2” holes clear through the floor about 6” apart outside of the circle you drew on the floor.
Step 3: Using a sledge hammer or an electric hammer, bust out the concrete from the center out to the ring of holes. Remove the loose concrete. It’s best to have a few buckets nearby to fill up with the loose concrete and debris.
Step 4: Now that you have your floor busted, you’ll need to dig the hole to fit the basin into. Dig down about 30″ from the top of the concrete floor so you can fit the basin and a bed of rock beneath it. Next, pour about a 5” to 6″ base of 1/2” rock in the hole to set the sump basin on. You’ll need to add or remove rock so the top of the basin is flush with the surface of the concrete floor. This bed of rock underneath the basin helps to level the basin with the floor, as well as, add proper drainage below the basin.
Step 5: With the basin in place, pour rock around the outside of the basin until the rock is 2” to 3” from the surface of the concrete floor. Pour cement around the basin and trowel flush with the surface of the concrete floor.
Step 6: Now, it’s time to install the sump pump itself. Included in our DIY sump pump kit is a Zoeller 1/3HP M53 sump pump (or Zoeller 1/2HP M98 upgraded sump pump depending on what you selected). Installation of either sump pump is the same. If you opted for the Zoeller Battery Backup add-on, follow the installation instructions provided by the manufacturer.
Step 7: Screw the threaded Jackel 1-1/2” check valve directly into the sump pump. Place the sump pump into the basin and plumb your 1-1/2” PVC discharge pipe (purchased separately at your local home center) into the top of the check valve. Fasten the basin lid in place threading your 1-1/2” discharge pipe and sump pump cord through the appropriate holes.
Step 8: Finish plumbing the 1-1/2” discharge line near the chosen exterior wall exit point and attach 90-degree elbow to direct discharge line through the exterior wall. Bore a hole through the exterior wall to accommodate the discharge pipe. Attach a piece of 1-1/2” PVC pipe into the 90-degree elbow and place pipe through the hole you bored. You’ll want the exterior discharge pipe to stick out from the home about 6” and ideally be about 24” above the ground. Seal around the pipe at the home. Plug your sump pump in and you’re finished.
